Find a region and its exits
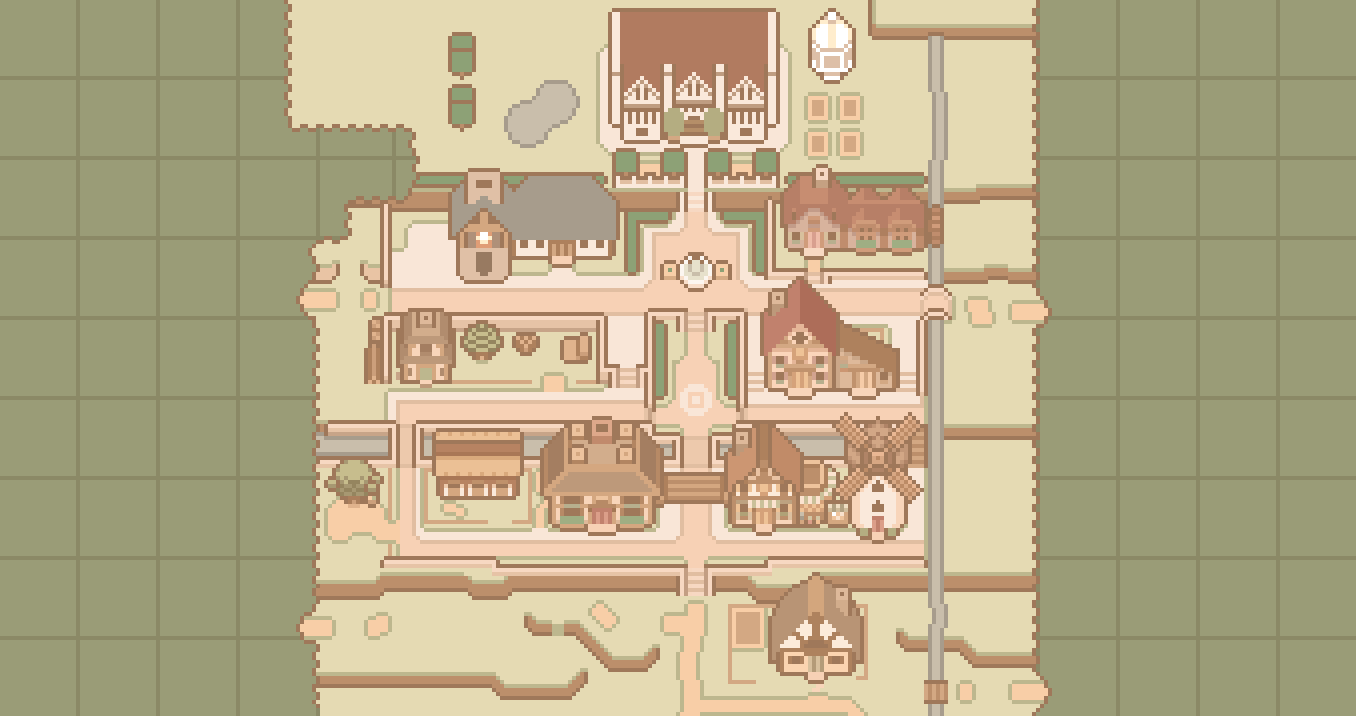
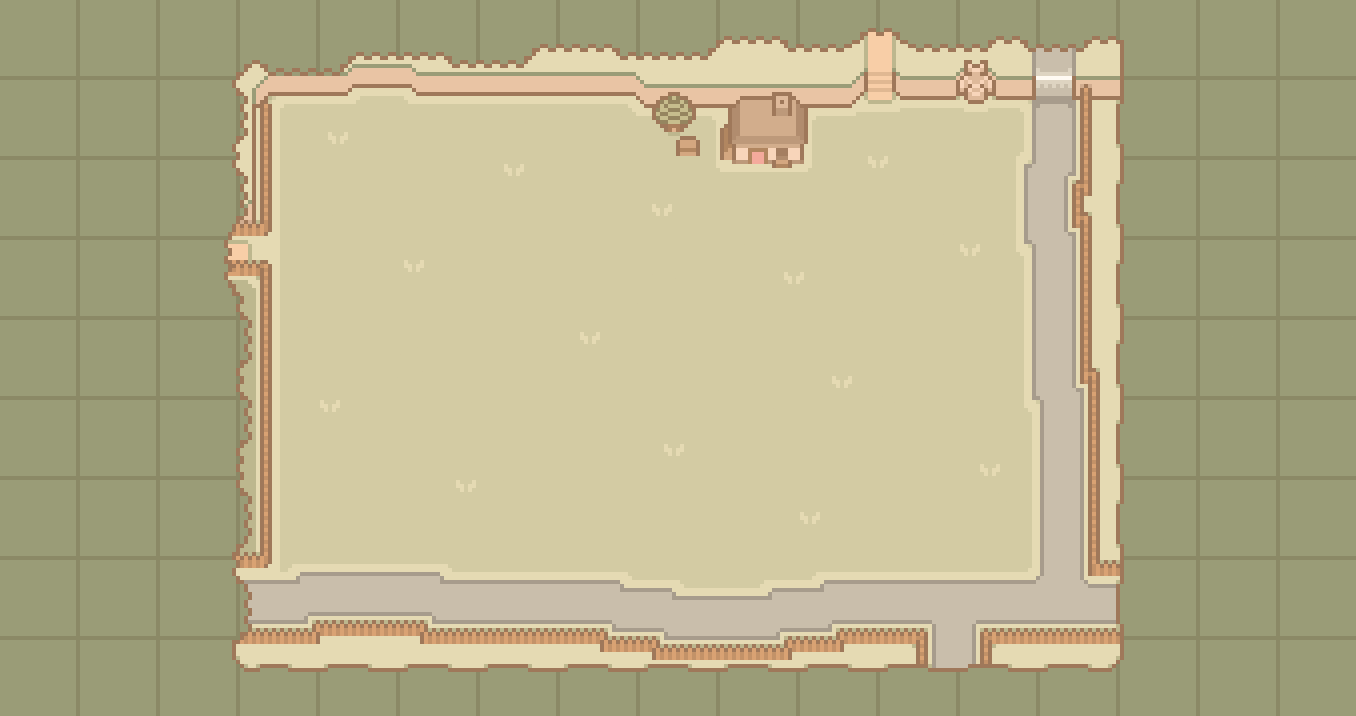
Expand a region to compare its shape and exits with your in-game map. Images are static references from the linked Wiki location pages, not live NPC tracking or a map of every unlock. Repairs, story progress and your farm layout can differ; the directions identify blocked routes separately from the regions already reachable.
Mistria (area map)
South: your Farm. West: the Narrows. East: the Eastern Road.
Farm (area map)
North: town. West: Sweetwater Farm. This is a reference layout, not your placed buildings or crops.
The Narrows (area map)
East: town. South: Sweetwater Farm. West: the Western Ruins. The stairs west of the Museum need the Beautification Project before the upper route opens.
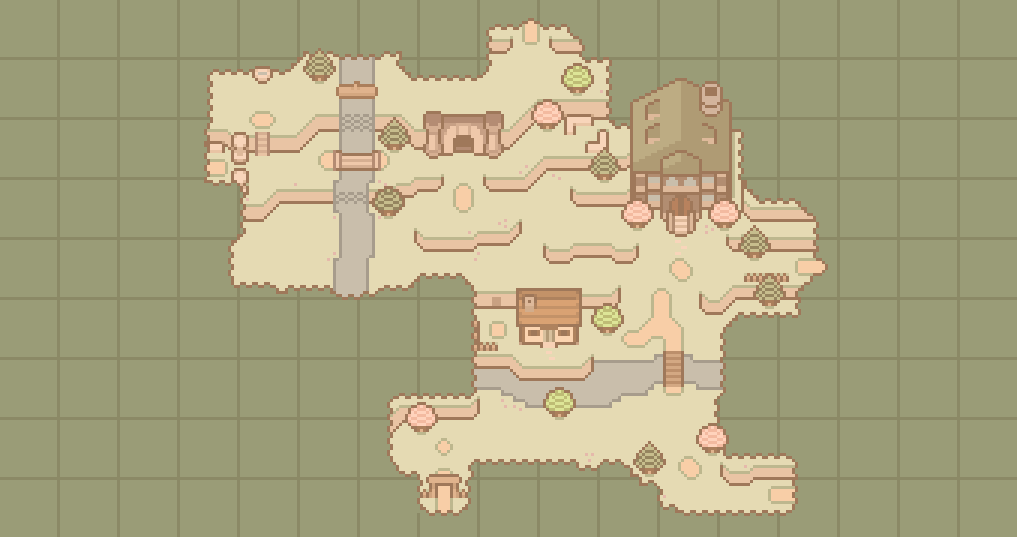
The Eastern Road (area map)
West: town. Find the Carpenter near the northwest entrance. The northeast Deep Woods route needs Dragon's Breath for its blocking vines.
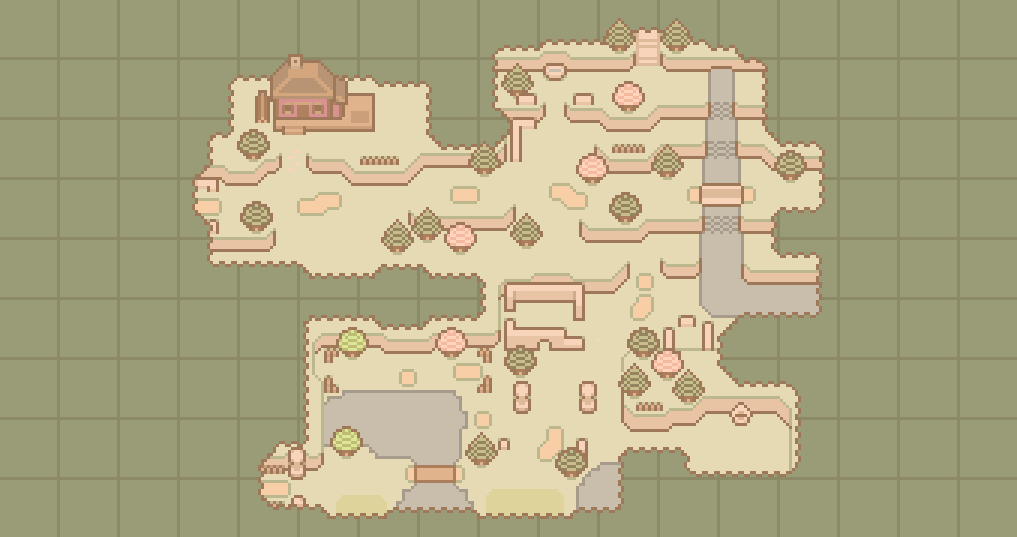
The Beach (area map)
North: Sweetwater Farm. The bridge gap west of the Tackle Shop is repaired separately; reaching the main beach does not require that repair.
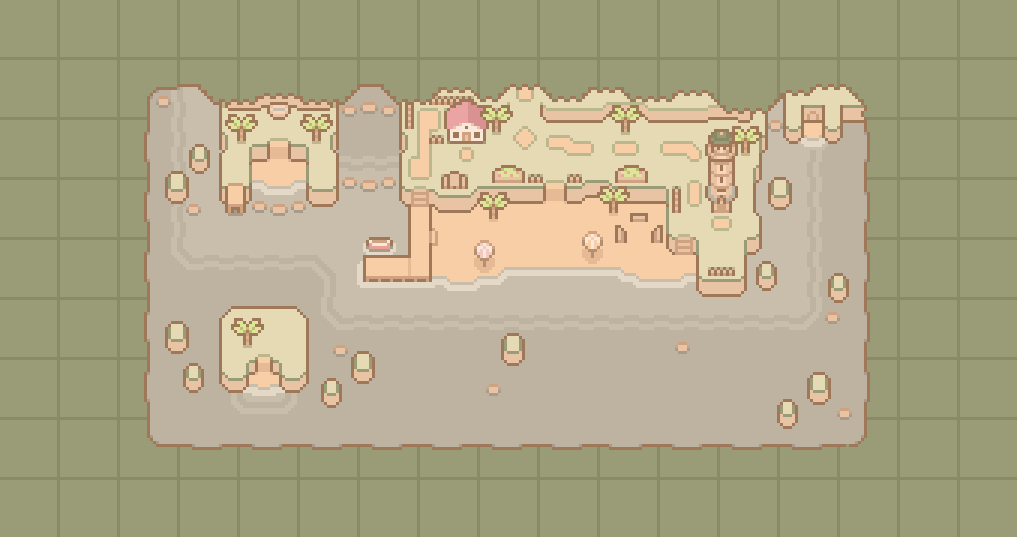
The Western Ruins (area map)
East: the Narrows. The Digsite is in the south. The upper staircase is not open at the start.
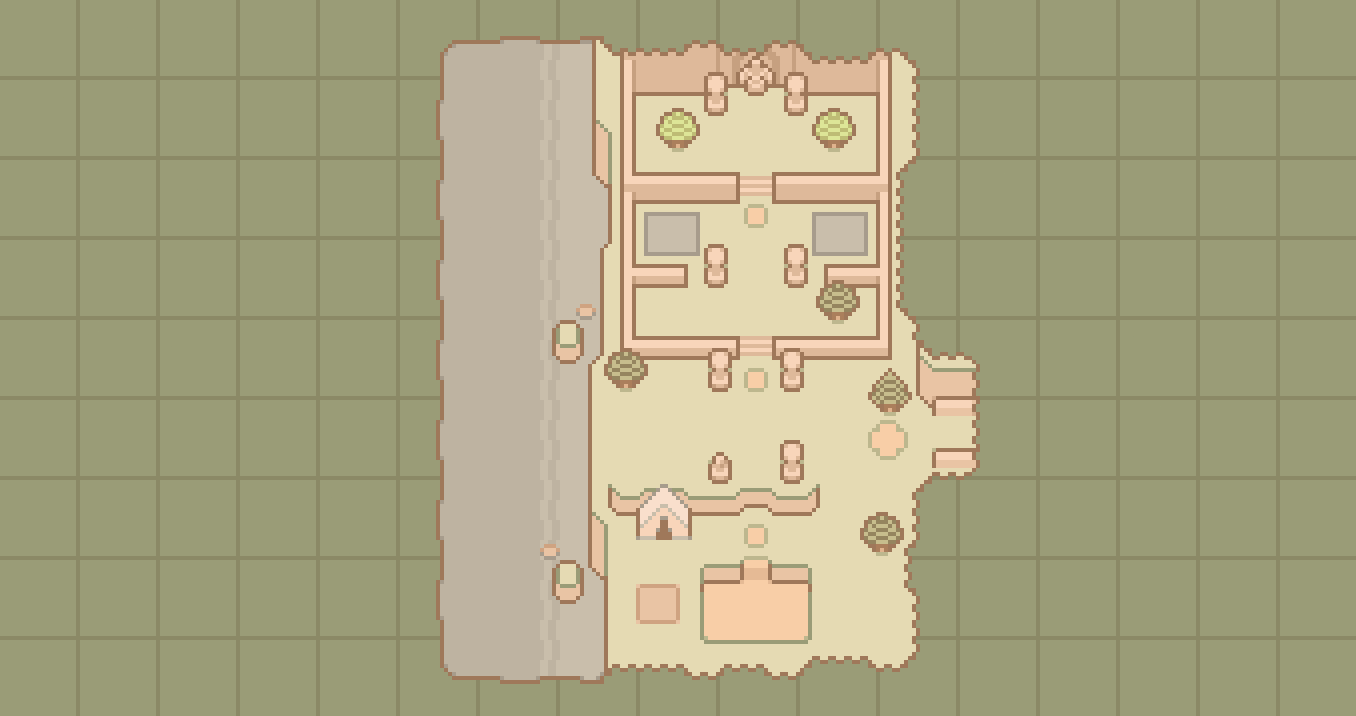
Sweetwater Farm (area view)
East: your Farm. North: the Narrows. South: the Beach. Hayden's house/shop is west of the path from your farm; the Chicken Statue is on the west coast.
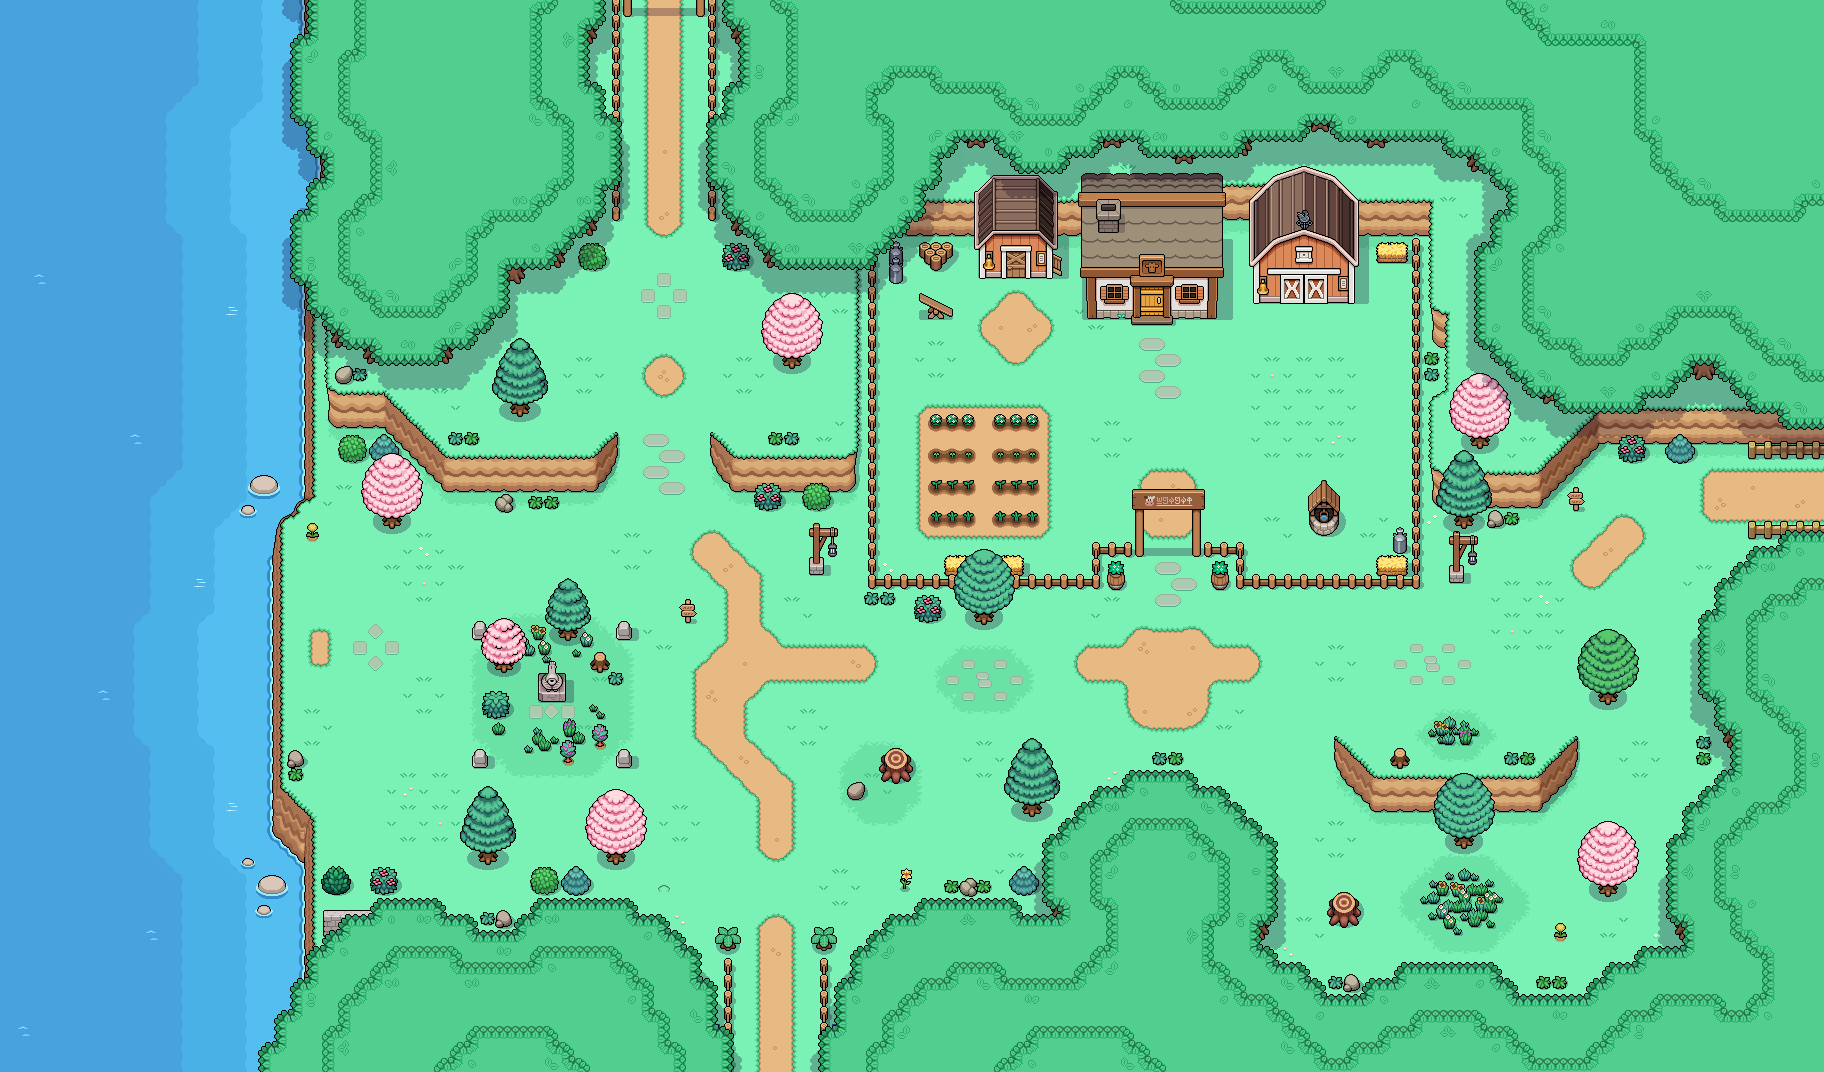
Deep Woods travel shortcut — story spoilers
Complete Breaking the Fire Seal and visit the Deep Woods first. The Caldarus statue east of your farmhouse then gains a teleport option: interact with it and spend 10 Essence to travel instantly to the Deep Woods. Keep those requirements separate from buying skill perks at the shrine; unlocking perks on Spring 3 does not by itself unlock this shortcut.
Use it for a Deep Woods trip when saving the walk matters more than saving that Essence. The shrine cannot be moved closer to your fields. The prerequisites, cost and fixed location are recorded in Farm revision 58222.
Change the day length and avoid oversleeping
Open a save, then open Settings → Accessibility → Day Time Speed. Choose Standard, Longer or Longest and sleep for the change to take effect. The setting cannot be changed from the main menu.
| In-game time | What happens with the default penalty enabled |
|---|---|
| 6 AM | Normal wake-up time. |
| 8 PM | The night bell rings and farm animals begin sleeping. |
| Midnight | A reminder tells you to return home. |
| 2 AM | You collapse; the following day starts at 10 AM with 75% health and stamina. |
Look for Oversleep Penalty in the in-game Settings if your save behaves differently from the table. The checked Journal page disagrees with its own history about the submenu, so follow the option's name rather than an assumed tab. For your first week, use the midnight reminder to stop starting new errands and follow the beginner route.
Recover at the Bathhouse or an unlocked fountain
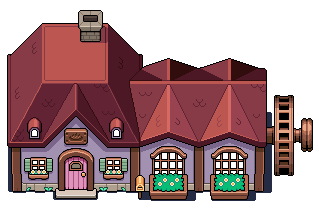
The Bathhouse is northeast in town, above the Clinic. Enter the lobby and use the counter in the middle of the room to pay for a bath. This restores health and stamina; the ordinary bath does not require buying the 100,000t Bath Soap used for a romantic date.
The normal price starts at 100t, increases by 200t with each use, and resets to 100t on a new day. Without free uses, successive prices are 100t, 300t, then 500t. After completing Stinky Stamina Potion, the next five baths are free. Check the counter's current price before confirming another visit instead of budgeting every bath at 100t. Bathhouse location and pricing, revision 57754.
For a smaller recovery while travelling, each unlocked Rejuvenating Fountain restores 20 health and 20 stamina once per day per fountain. The Eastern Road fountain needs the large rock cleared with a Copper Pickaxe or better; the Narrows fountain needs the stairs west of the Museum repaired through Beautification of Mistria; the Beach fountain needs the Beach Bridge repaired. Revisit the same fountain tomorrow, or use a different unlocked one today. Fountain access and limits, revision 61135.
Read tomorrow's weather before choosing a fishing trip
- Complete Stinky Stamina Potion to receive the Weather Crystal Ball, or check Merri's stall for one at 500t.
- Place it where you will pass before bed and interact with it. Read the text prediction if the small weather image is unclear.
- Match the forecast with the target fish or insect's condition, then prepare for that trip tomorrow.
| Weather group used for fishing and bugs | Weather to look for |
|---|---|
| Calm | Sunny |
| Special | Breezy, in spring or fall |
| Inclement | Rain or snow |
| Heavy inclement | Thunderstorm or blizzard |
The crystal predicts the next day, not the weather you are standing in. Use the fish atlas and museum guide to select a target before leaving.
What to change in today's chores
| Current weather | Crops on the farm | Livestock and pet jobs |
|---|---|---|
| Sunny, spring petals or fall leaves | No automatic watering from this weather; check your planted tiles before leaving. | Livestock can go outside; pets can complete outdoor jobs. |
| Rain or thunderstorm | Farm crops are watered automatically. | Keep livestock in the coop or barn; pets stay inside. |
| Winter snow or blizzard | Farm crops are watered automatically. | Keep livestock in the coop or barn; pets stay inside. |
Falling petals and leaves mean wind, not rain. For legendary fish, match the season as well: spring wind for Cherry Fish, fall wind for Leaf Fish, summer storms for Lightning Fish, and winter blizzards for Snow Fish. Weather alone does not replace the legendary-fishing prerequisites.
If particles obscure the view, open Settings → Accessibility → Weather Particles and choose Default, Low or Off. This is a visual setting, not a way to change spawn conditions. These weather effects follow Weather revision 62575.
Build a greenhouse for year-round crops
Complete Upgrade the Carpenter's Shop, then buy a greenhouse blueprint from the Carpenter. Small and large greenhouses each have white and wood appearances; choose capacity first and appearance second.
| Size | Indoor growing area | Blueprint price | Construction materials |
|---|---|---|---|
| Small | 5 × 5, 25 spaces | 50,000t | 20 Hard Wood, 20 Glass, 20 Refined Stone |
| Large | 10 × 10, 100 spaces | 100,000t | 40 Hard Wood, 40 Glass, 40 Refined Stone |
These are indoor growing spaces, not the building's outdoor footprint. Clear a destination, place the blueprint where the game accepts it and supply the listed materials. Check the finished interior before buying seeds for all available spaces.
Seasonal crops and fruit trees can produce year-round inside. Fruit trees occupy a 3 × 3 space, so plan their positions before planting surrounding crops. If you remove and rebuild a greenhouse elsewhere, growing crops inside are destroyed; finish the harvests you want to keep before moving it.
Use the Refined Stone guide for that building material, and seasonal crop tables to choose what to grow.
Visit the Wishing Well
Bring a Copper Pickaxe or better to the Eastern Road and break the large rock blocking the well. Interact with the well and choose 100t or 500t. You can make one offering per day, not one at each price.
The reward is drawn from a pool; paying more does not let you choose a specific recipe or decoration. The checked page lists these possible results, not drop percentages:
| Offering | Possible rewards in the checked table |
|---|---|
| 100t: appearance | Soup Pot Hat; Teapot Hat |
| 100t: food | Wild Berry Jam; Blueberry Jam; Cabbage Slaw; Spring Salad; Latte with Speedy infusion |
| 100t: materials | 2 Ruby; 2 Sapphire; 2 Emerald; 2 Copper Ingots; Iron Ingot (quantity unspecified) |
| 500t: dishes or recipes | Berry Bowl, Spicy Cheddar Biscuit, Fried Rice — each can appear as a dish or its recipe scroll |
| 500t: materials | 2 Silver Ingots |
| 500t: furniture | Dragon Wall Head Piece; 5 Dragon Road Walls; Dragon Wall Tail Piece; Dragon Ruins Pillar; Dragon Stained Glass Window; Water Altar; Large Dragon Rug; Dragon Chest; Dragon Lamp |
Other quantities are unspecified in the source. Dragon Relief Wallpaper and Dragon Mosaic Flooring are commented out there and are not included in this active pool. If you want a particular item, check its other acquisition sources before spending several days on random offerings.
Choose a Chicken Statue offering
Go to the western side of Sweetwater Farm with Shiny Beads in your inventory. Interact with the Chicken Statue and choose 10 or 100 beads. These are random reward pools, not a shop: 100 beads do not guarantee a recipe or ten rolls of the 10-bead pool.
| Offering | Possible rewards and quantities explicitly listed |
|---|---|
| 10: recipe scrolls | Deviled Eggs; Omelet; Pudding; Quiche; Vegetable Quiche. Each is eligible only if not previously obtained. |
| 10: finished dishes | Omelet; Pudding; Quiche; Vegetable Quiche. Receiving a dish does not teach its recipe. |
| 10: animal products | Chicken Egg ×3; Milk ×3; Golden Egg; Golden Milk |
| 10: processed products | Cheese ×2; Butter ×2; Mayonnaise ×2 |
| 10: feed | Quality Small Animal Feed ×10; Quality Large Animal Feed ×10; Deluxe Small Animal Feed ×5; Deluxe Large Animal Feed ×5 |
| 10: money | Purse worth 200t; use the purse after receiving it. |
| 100: finished dishes | Golden Cookies ×2; Golden Cheesecake ×2 — not recipe scrolls |
| 100: animal products | Golden Egg ×12; Golden Milk ×12 |
| 100: processed products | Golden Mayonnaise ×2; Golden Cheese ×6; Golden Butter ×6 |
| 100: feed | Ultimate Large Animal Feed ×10; Ultimate Small Animal Feed ×10 |
| 100: money | Purse worth 2,000t |
The 10-bead pool also includes the following animal cosmetics. All require that the cosmetic has not previously been obtained; animals other than chickens and cows additionally need to be unlocked. Pet cosmetics require pets to be unlocked.
| Animal | Possible cosmetics |
|---|---|
| Alpaca | Alpaca Spiked Collar; Alpaca Gold Pendant |
| Capybara | Capybara Bowler Hat; Capybara Leaf Hat |
| Chicken | Chicken Pearl Necklace; Chicken Business Tie |
| Cow | Cow Halo; Cow Beret |
| Duck | Duck Ruffled Collar; Duck Sun Hat |
| Horse | Horse Crown; Horse Derby Hat |
| Rabbit | Rabbit Halo; Rabbit Heart Clips |
| Sheep | Sheep Tartan Beret; Sheep Unicorn Horn |
| Pet | Pet Black Bow; Pet Blue Bow; Pet Flower Crown; Pet Green Bow; Pet Halo; Pet Pink Bow; Pet Purple Bow; Pet Red Bow; Pet Sun Hat; Pet Unicorn Horn; Pet Yellow Bow |
Quantities without a multiplier are not specified by the source. No drop probabilities are published in this table. For recipe hunting, use the 10-bead tier and check whether the reward is a scroll; save 100-bead offerings for their different product/feed pool. See animal feeding skills for bead-producing perks and the recipe reference for what each scroll lets you cook.
World catalogue
Showing 43 / 52 entries
9 late-game or story entries are hidden by default. Enable “Show spoilers” to view them.
Aldaria
- Type
- Location
- Region
- The checked source does not list this detail.
- Access
- The kingdom containing Mistria, not a separate travel destination.
- Season
- The checked source does not list this detail.
- Details
- Type: Kingdom
Related guides: First-season guide
Artifact Replicator
- Type
- Location
- Region
- The Museum
- Access
- Complete one Archaeology set for the route documented in the developer announcement.
- Season
- The checked source does not list this detail.
- Details
- The source infobox says any wing, but its quoted developer announcement specifies Archaeology. Other-wing unlocking is not confirmed here.
- Convert a spare artifact into placeable furniture. Dig Site materials have no replicas.
- The checked replica table lists 75t sale values. Compare the original artifact price before converting it for money.
Related guides: Museum guide, Related guide
Balor's Wagon
- Type
- Location, Store
- Region
- Mistria
- Access
- Available from the start
- Season
- The checked source does not list this detail.
- Details
- Location: Mistria
- Unlock: Available from the start
- Type: Store
Related guides: First-season guide
 Bathhouse
- Type
- Location
- Region
- Mistria
- Access
- Available from the start
- Season
- The checked source does not list this detail.
- Details
- Location: Mistria
- Unlock: Available from the start
- Residents: Juniper; Dozy
- Type: Store / Residence
Related guides: First-season guide
Blacksmith
- Type
- Location, Residence, Store
- Region
- Mistria
- Access
- Available from the start
- Season
- The checked source does not list this detail.
- Details
- Location: Mistria
- Unlock: Available from the start
- Residents: March; Olric
- Type: Store / Residence
Related guides: First-season guide
Capital
- Type
- Location
- Region
- The Kingdom of Aldaria; (Outside of Mistria)
- Access
- Mentioned in the story; not an accessible location in the checked source.
- Season
- The checked source does not list this detail.
- Details
- Location: The Kingdom of Aldaria; (Outside of Mistria)
- Residents: The King Kelinien; Baroness Linnet of Mistria; Baron Wiscar of Mistria; The Royal Physician: Briar; (Ryis') Unnamed Aunt; (Ryis') Unnamed Mother & Father; (Ryis') Unnamed Sisters (x?)
- Type: Region (not seen in game)
Related guides: First-season guide
Carpenter
- Type
- Location, Residence, Store
- Region
- The Eastern Road
- Access
- Available from the start
- Season
- The checked source does not list this detail.
- Details
- Location: The Eastern Road
- Residents: Ryis; Landen
- Unlock: Available from the start
- Type: Store / Residence
Related guides: First-season guide
Celine's Cottage
- Type
- Location, Residence
- Region
- Mistria
- Access
- The checked source does not list this detail.
- Season
- The checked source does not list this detail.
- Details
- Location: Mistria
- Residents: Celine
- Type: Residence
Related guides: First-season guide
Chicken Statue
- Type
- Location
- Region
- Sweetwater Farm
- Access
- Find it on the western side of Sweetwater Farm and bring Shiny Beads for an offering.
- Season
- The checked source does not list this detail.
- Details
- Location: Sweetwater Farm
- Type: Random Reward Giver
- The offering choices use 10 or 100 Shiny Beads; they are not Tesserae payments.
Related guides: First-season guide
Clinic
- Type
- Location, Residence, Store
- Region
- Mistria
- Access
- Available from the start
- Season
- The checked source does not list this detail.
- Details
- Location: Mistria
- Unlock: Available from the start
- Residents: Valen
- Type: Store / Residence
Related guides: First-season guide
Dragon Forge
- Type
- Location
- Region
- Mines/Ancient_Ruins#Floor_90|Floor 90 of Ancient Ruins (81–99)
- Access
- Story Quest "Find the Magic Key"
- Season
- The checked source does not list this detail.
- Details
- Location: Mines/Ancient_Ruins#Floor_90|Floor 90 of Ancient Ruins (81–99)
- Unlock: Story Quest "Find the Magic Key"
- Type: Processor
Related guides: First-season guide
Errol's Cabin
- Type
- Location, Residence
- Region
- The Narrows
- Access
- The checked source does not list this detail.
- Season
- The checked source does not list this detail.
- Details
- Location: The Narrows
- Residents: Errol
- Type: Residence
Related guides: First-season guide
Farm
- Type
- Location
- Region
- Mistria
- Access
- Your starting farm is south of Mistria. Go west to Sweetwater Farm; go north to town.
- Season
- The checked source does not list this detail.
- Details
- Location: Mistria
- Residents: The Player; Pet; Farm Animals (conditional); Caldarus
- The Shipping Bin is left of the farmhouse; the mailbox is on its right. Rename the farm from the Journal character-customization screen.
Related guides: First-season guide
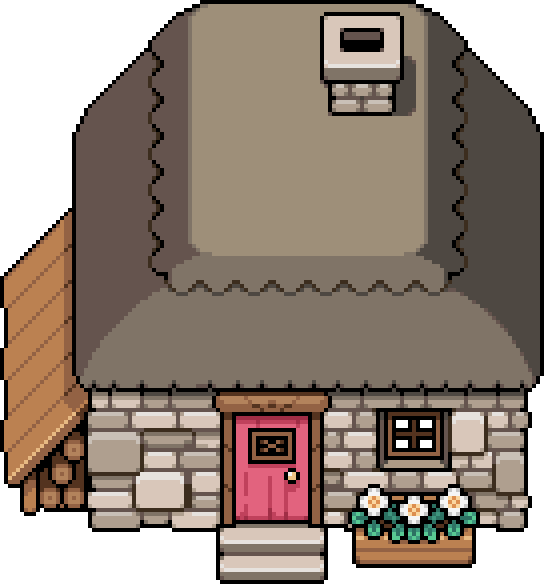 Farmhouse
- Type
- Location, Residence
- Region
- Farm
- Access
- Enter the house on your farm; this is your starting home.
- Season
- The checked source does not list this detail.
- Details
- Location: Farm
- Residents: The Player; Pet; The Player's Spouse (Conditional); The Player's Child (Conditional)
- Type: Residence
- Use the Diary to save without ending the day. Use the Worn Bed to end the day and save automatically. The wall calendar shows dates, events and birthdays.
Related guides: First-season guide
Fish Trap
- Type
- Location
- Region
- The_Beach#Fish_Trap|The Beach
- Access
- Story Quest "Repair the Beach Bridge"
- Season
- The checked source does not list this detail.
- Details
- Location: The_Beach#Fish_Trap|The Beach
- Unlock: Story Quest "Repair the Beach Bridge"
Related guides: First-season guide
General Store
- Type
- Location, Residence, Store
- Region
- Mistria
- Access
- Available from the start
- Season
- The checked source does not list this detail.
- Details
- Location: Mistria
- Unlock: Available from the start
- Residents: Nora; Holt; Dell
- Type: Store / Residence
Related guides: First-season guide
Hayden's Shop
- Type
- Location, Residence, Store
- Region
- Sweetwater Farm
- Access
- Available from the start
- Season
- The checked source does not list this detail.
- Details
- Location: Sweetwater Farm
- Unlock: Available from the start
- Residents: Hayden; Henrietta
- Type: Store / Residence
Related guides: First-season guide
Horse Statue
- Type
- Location
- Region
- The Narrows
- Access
- Story Quest "Find the Weathervane"
- Season
- The checked source does not list this detail.
- Details
- Location: The Narrows
- Unlock: Story Quest "Find the Weathervane"
- Type: Skill Statue
Related guides: First-season guide
Inn
- Type
- Location, Residence, Store
- Region
- Mistria
- Access
- Available from the start
- Season
- The checked source does not list this detail.
- Details
- Location: Mistria
- Unlock: Available from the start
- Residents: Hemlock; Josephine; Reina; Luc; Maple; Balor
- Type: Store / Residence
Related guides: First-season guide
Lighthouse
- Type
- Location
- Region
- The Beach
- Access
- Currently inaccessible; no entry route is documented in the checked source.
- Season
- The checked source does not list this detail.
- Details
- Location: The Beach
- Unlock: Currently inaccessible; no entry route is documented in the checked source.
Related guides: First-season guide
Lost and Found
- Type
- Location
- Region
- Mistria
- Access
- Story Quest "Lost and Found"
- Season
- The checked source does not list this detail.
- Details
- Location: Mistria
- Unlock: Story Quest "Lost and Found"
Related guides: First-season guide
Manor House
- Type
- Location, Residence
- Region
- Mistria
- Access
- The checked source does not list this detail.
- Season
- The checked source does not list this detail.
- Details
- Location: Mistria
- Type: Residence
- Residents: Adeline; Eiland; Elsie
Related guides: First-season guide
Mill
- Type
- Location
- Region
- Mistria
- Access
- Story Quest "The Mill Restoration Project"
- Season
- The checked source does not list this detail.
- Details
- Location: Mistria
- Unlock: Story Quest "The Mill Restoration Project"
- Type: Processor
Related guides: First-season guide
Mines
- Type
- Location
- Region
- The Narrows
- Access
- Story Quest "Unlocking The Mines"
- Season
- The checked source does not list this detail.
- Details
- Location: The Narrows
- Unlock: Story Quest "Unlocking The Mines"
Related guides: First-season guide
Find a soundtrack track or Song Crystal
The lookup below includes all 53 tracks and 22 released Song Crystals listed by the checked Wiki revisions. Filter Soundtrack to find where a piece plays and who composed it. Filter Song Crystal to find the matching Crystal and its exact acquisition route; enable spoilers before searching those collectible rows.
The music filename identifies the associated in-game track. This site does not copy or stream the Wiki's audio files. A blank scene in the checked soundtrack table is shown as “the checked source does not list this detail” instead of an invented location.
Showing 53 / 75 entries
22 late-game or story entries are hidden by default. Enable “Show spoilers” to view them.
Main Theme
- Type
- Soundtrack
- Track no.
- 1
- Where it plays
- Main Menu
- Composer
- Hidehito Ikumo
- Music file name
- Main Theme.ogg
- How to obtain
- The checked source does not list this detail.
Related guides: Related guide
Spring - Wake Up, Little Seed
- Type
- Soundtrack
- Track no.
- 2
- Where it plays
- Daytime during Spring
- Composer
- Hidehito Ikumo
- Music file name
- Spring - Wake Up, Little Seed.ogg
- How to obtain
- The checked source does not list this detail.
Related guides: Related guide
Spring - Let's Go for a Walk
- Type
- Soundtrack
- Track no.
- 3
- Where it plays
- Daytime during Spring
- Composer
- Hidehito Ikumo
- Music file name
- Spring - Let's Go for a Walk.ogg
- How to obtain
- The checked source does not list this detail.
Related guides: Related guide
Spring - Tenacious Sprout
- Type
- Soundtrack
- Track no.
- 4
- Where it plays
- Daytime during Spring
- Composer
- Hidehito Ikumo
- Music file name
- Spring - Tenacious Sprout.ogg
- How to obtain
- The checked source does not list this detail.
Related guides: Related guide
Summer - Lens Flare
- Type
- Soundtrack
- Track no.
- 5
- Where it plays
- Daytime during Summer
- Composer
- Hidehito Ikumo
- Music file name
- Summer - Lens Flare.ogg
- How to obtain
- The checked source does not list this detail.
Related guides: Related guide
Summer - Village Life
- Type
- Soundtrack
- Track no.
- 6
- Where it plays
- Daytime during Summer
- Composer
- Hidehito Ikumo
- Music file name
- Summer - Village Life.ogg
- How to obtain
- The checked source does not list this detail.
Related guides: Related guide
Summer - Gathering Clouds
- Type
- Soundtrack
- Track no.
- 7
- Where it plays
- Daytime during Summer
- Composer
- Hidehito Ikumo
- Music file name
- Summer - Gathering Clouds.ogg
- How to obtain
- The checked source does not list this detail.
Related guides: Related guide
Summer - Shaking Off A Storm
- Type
- Soundtrack
- Track no.
- 8
- Where it plays
- Daytime during Summer
- Composer
- Catton Arthur
- Music file name
- Summer - Shaking Off A Storm.ogg
- How to obtain
- The checked source does not list this detail.
Related guides: Related guide
Fall - Crows In A Clear Sky
- Type
- Soundtrack
- Track no.
- 9
- Where it plays
- Daytime during Fall
- Composer
- Hidehito Ikumo
- Music file name
- Fall - Crows In A Clear Sky.ogg
- How to obtain
- The checked source does not list this detail.
Related guides: Related guide
Fall - Changing Winds
- Type
- Soundtrack
- Track no.
- 10
- Where it plays
- Daytime during Fall
- Composer
- Hidehito Ikumo
- Music file name
- Fall - Changing Winds.ogg
- How to obtain
- The checked source does not list this detail.
Related guides: Related guide
Fall - Dance Of The Leaves
- Type
- Soundtrack
- Track no.
- 11
- Where it plays
- Daytime during Fall
- Composer
- Hidehito Ikumo
- Music file name
- Fall - Dance Of The Leaves.ogg
- How to obtain
- The checked source does not list this detail.
Related guides: Related guide
Winter - Fresh Snow
- Type
- Soundtrack
- Track no.
- 12
- Where it plays
- Daytime during Winter
- Composer
- Hidehito Ikumo
- Music file name
- Winter - Fresh Snow.ogg
- How to obtain
- The checked source does not list this detail.
Related guides: Related guide
Winter - The World Glitters
- Type
- Soundtrack
- Track no.
- 13
- Where it plays
- Daytime during Winter
- Composer
- Hidehito Ikumo
- Music file name
- Winter - The World Glitters.ogg
- How to obtain
- The checked source does not list this detail.
Related guides: Related guide
Memory Rain
- Type
- Soundtrack
- Track no.
- 14
- Where it plays
- Daytime during rainy weather
- Composer
- Hidehito Ikumo
- Music file name
- Memory Rain.ogg
- How to obtain
- The checked source does not list this detail.
Related guides: Related guide
Quenched Earth
- Type
- Soundtrack
- Track no.
- 15
- Where it plays
- The checked source does not list this detail.
- Composer
- Hidehito Ikumo
- Music file name
- Quenched Earth.ogg
- How to obtain
- The checked source does not list this detail.
Related guides: Related guide
Blue Skies Will Return
- Type
- Soundtrack
- Track no.
- 16
- Where it plays
- The checked source does not list this detail.
- Composer
- Hidehito Ikumo
- Music file name
- Blue Skies Will Return.ogg
- How to obtain
- The checked source does not list this detail.
Related guides: Related guide
Quiet Winter
- Type
- Soundtrack
- Track no.
- 17
- Where it plays
- The checked source does not list this detail.
- Composer
- Hidehito Ikumo
- Music file name
- Quiet Winter.ogg
- How to obtain
- The checked source does not list this detail.
Related guides: Related guide
Prepare To Descend
- Type
- Soundtrack
- Track no.
- 18
- Where it plays
- Entrance to The Mines
- Composer
- Catton Arthur
- Music file name
- Prepare To Descend.ogg
- How to obtain
- The checked source does not list this detail.
Related guides: Related guide
Let's Get to Work
- Type
- Soundtrack
- Track no.
- 19
- Where it plays
- Upper Mines
- Composer
- Catton Arthur
- Music file name
- Let's Get to Work.ogg
- How to obtain
- The checked source does not list this detail.
Related guides: Related guide
Dig Deeper
- Type
- Soundtrack
- Track no.
- 20
- Where it plays
- Upper Mines
- Composer
- Catton Arthur
- Music file name
- Dig Deeper.ogg
- How to obtain
- The checked source does not list this detail.
Related guides: Related guide
Rest a While
- Type
- Soundtrack
- Track no.
- 21
- Where it plays
- Upper Mines
- Composer
- Catton Arthur
- Music file name
- Rest a While.ogg
- How to obtain
- The checked source does not list this detail.
Related guides: Related guide
The Seal
- Type
- Soundtrack
- Track no.
- 22
- Where it plays
- Level 20, 40, 60, 80 and ? of The Mines
- Composer
- Hidehito Ikumo
- Music file name
- The Seal.ogg
- How to obtain
- The checked source does not list this detail.
Related guides: Related guide
Glimmering Spring
- Type
- Soundtrack
- Track no.
- 23
- Where it plays
- Tide Caverns
- Composer
- Catton Arthur
- Music file name
- Glimmering Spring.ogg
- How to obtain
- The checked source does not list this detail.
Related guides: Related guide
A Rising Tide
- Type
- Soundtrack
- Track no.
- 24
- Where it plays
- Tide Caverns
- Composer
- Catton Arthur
- Music file name
- A Rising Tide.ogg
- How to obtain
- The checked source does not list this detail.
Related guides: Related guide
Aquifer Echo
- Type
- Soundtrack
- Track no.
- 25
- Where it plays
- Tide Caverns
- Composer
- Catton Arthur
- Music file name
- Aquifer Echo.ogg
- How to obtain
- The checked source does not list this detail.
Related guides: Related guide
Buy fruit-tree saplings and leave enough room
General Store fruit-tree saplings cost 400t, with stock changing by season. After Upgrade the Carpenter's Shop, Balor's Wagon also stocks saplings at 400t throughout the year, without that seasonal restriction. Unlocking his stock does not make outdoor trees fruit out of season.
Keep a clear 3×3 area for each planting. Fruit trees take 14 days to reach maturity; in season, a mature tree produces three fruits every three days. Check the tree's season in the crop reference before buying it for an immediate recipe. Do not cut it for ordinary wood unless you intend to remove the orchard tree.